![]()
|
|
|
Adding a Boost Gauge to the MKI SC Originally by Tommy Guttmann Additions by Steve Hoult
I used a special pod from BEGI (made for Mustangs) that I modified
to fit the contour of the mk1 A-Pillar...but wait...you can't do that can you? Your
steering is on the wrong (oops! "right") side. You'll have to find a regular
"cup" and mount it in front of the center vent, unless you can find a similar
thing for right hand drive and modify it.
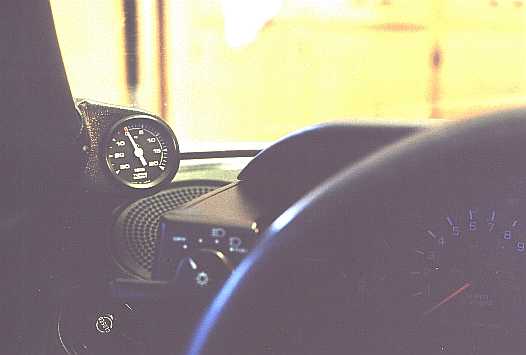
When I got my Blitz pulley I decided I needed a boost gauge to see what was happening. So armed with the above article, I purchased a Autometer gauge and gauge pod (about $45 total). The Gauge pod was for a Mustang, and it didn't fit at all. I remembered reading somewhere that a hair dryer could be used to soften the plastic so it could be molded. Tommy suggested that the haair dryer wouldn't put out enough heat. So I dragged out my propane torch and some wet rags. Carefully applying heat to the bottom side of the pod and pressing with the wet rag, I was able to mold the pod to the windshield pillar.
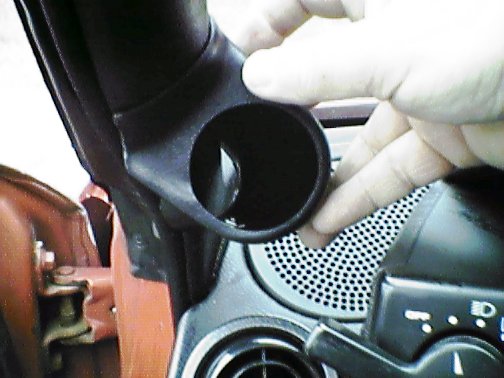
The next problem I found was how to run the vacuum line to the engine compartment. As you can see from the above photo, I left some room at the bottom of the pillar where it won't been seen, for the electrical and vacuum lines to be routed. If you follow the pillar to where it meets the windshield you'll find a small, black, soft area you can pass the lines through so that they end up behind the dashboard.
The gap you see was already there and the hose fits loosely in the gap.
I used a plastic vacuum line to run underneath the carpeting, along the door, to the back, running up the firewall behind the drivers seat. About 1/2 way up is a grommet I used to pass this plastic line through. Once into the engine compartment I connect to a high quality rubber vacuum hose which is run to the T in the Intake Manifold to the Brown Fuel Pressure VSV. The wire for the backlight is wired to the fuse box along with the other lights. One thing I did different then Tommy's install is to turn the gauge so that 0 psi is straight up. The only problem I have now is how to (semi) permanently attach this to the pillar. At this point I am using Gaffers tape. Gaffers Tape is a 2" wide, black, cloth backed tape used to temporarily tape cables to the floor for TV and film productions. Steve Hoult '89 SC ASP 9
Find out how to install your new SC Crank Pulley or How to reroute the ABV Lines |